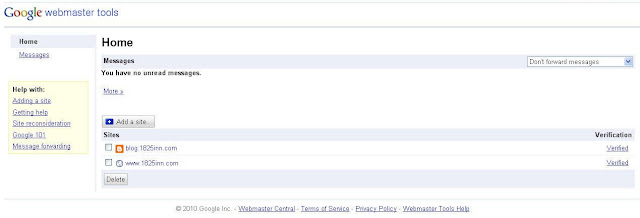
Step 1: Log into your Google Blogger Account
Step 2: Scroll Down to the bottom of the dashboard page. Under Tools and Resources click on Webmaster Tools
Step 3: In Webmaster Tools click the button for “Add a Site”
Step 4: Type in blog address IE: blog.domainname.com
Step 5: Click Continue
You should now see your Webmaster Tools Dashboard. If you would also like to include a Google Blogger XML Sitemap, follow the instructions below.
Step 1: Make sure you are on your Webmaster Tools Dashboard, and click the text link that corresponds to your blog URL, from the main screen of the dashboard.
Step 2: On the left hand side of the screen, click the + to expand the Site Configuration dropdown
Step 3: On the left hand side of the screen under the Site Configuration Section, Click Sitemaps
Step 4: On the Sitemap screen, Click the Button Box titled: SUBMIT A SITEMAP
Step 5: You will see your blog.domainname.com with an open field to the right
Step 6: Type in atom.xml (Must be lower case)
Step 7: Click Submit Site Map.
That’s all there is to it. Your Sub-Domain Blog is now available for viewing in Web Master Tools information regarding you blog.
Need more information on what Google Webmaster Tools can do for you? Learn more here!
Lisa Kolb
President and Co-Founder
Acorn Marketing

